Easy Cherry Apple Crumble
Say hello to the most delightful Cherry Apple Crumble recipe! It’s made with simple ingredients (mostly pantry staples!) and so, so good. Cherry and apple go together incredibly well for just the right balance of sweet & tart.
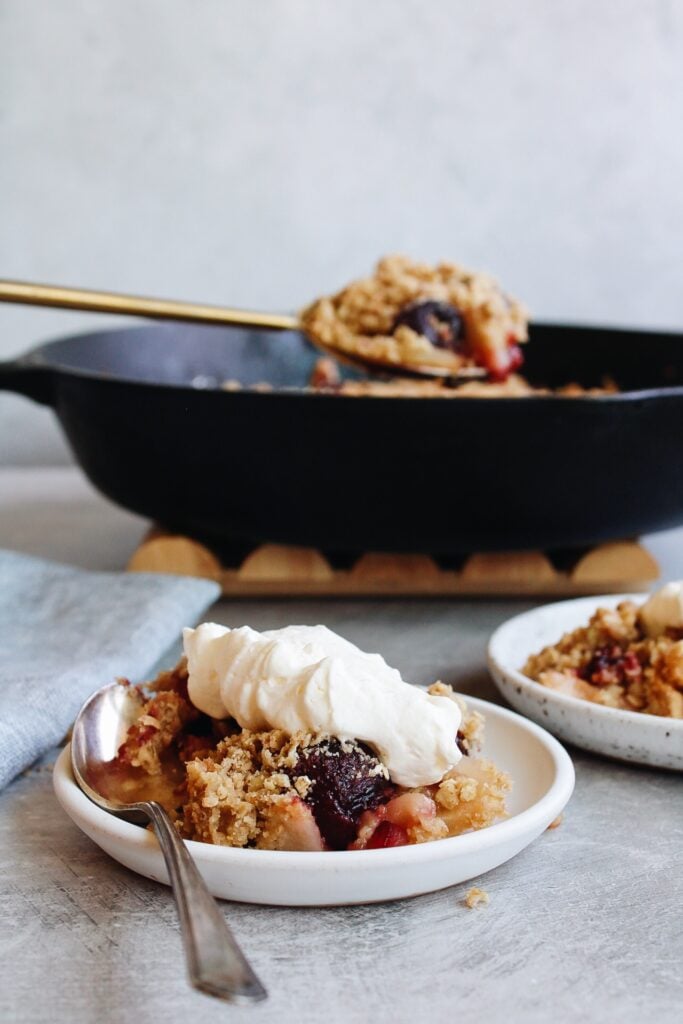
The fourth time’s a charm with this recipe. It took me several tries to get it just how I wanted it and I’m so happy with the finished result. What I wanted was a cherry apple crisp (crumble) recipe that wasn’t way too sweet (which I find cherry pie filling to be), and an easy crisp topping with the least amount of ingredients possible for maximum deliciousness. And here we are!
This is the perfect no-fuss dessert that everyone is familiar with but the fruit combo is fresh and fun. It’s like a mixture of apple pie and cherry pie but with a more crumbly texture for the crust. Let’s make this! Before cherries go out of season. 😉
Disclaimer: This post may contain affiliate links, which means if you decide to purchase any of the items linked in this post, I should earn a small commission. This creates no additional cost to you and helps support the work that goes into running The Fig Jar. Thank you! -Becky
Ingredients to make a cherry apple crumble
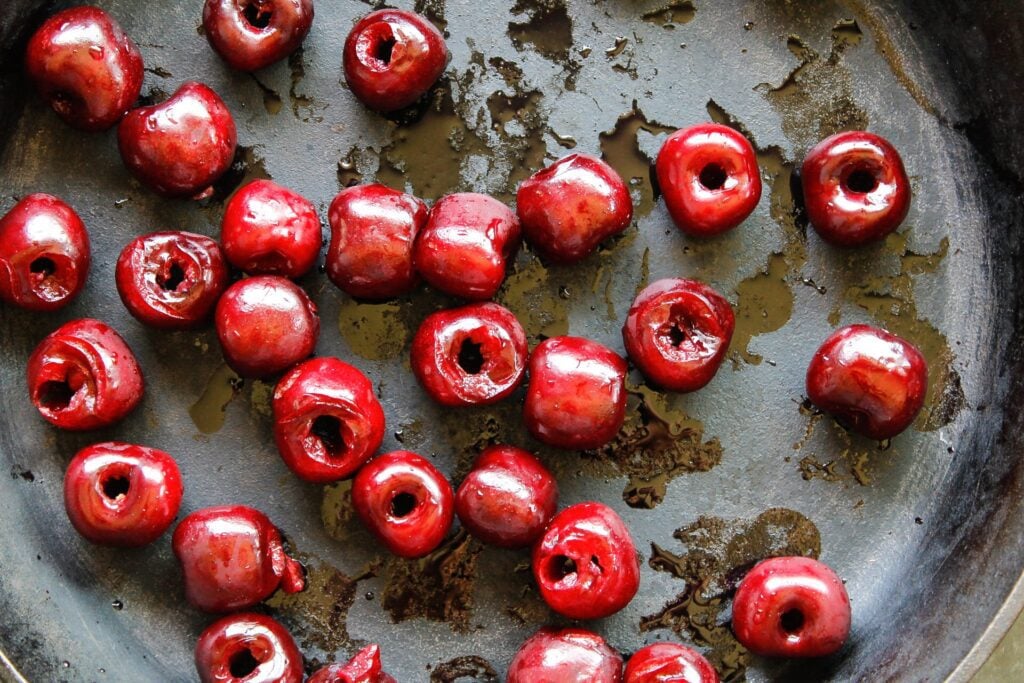
I’m basing the crumble topping in this recipe on my granola recipe. When I was testing it, I tried using olive oil but didn’t like the result. I considered using coconut oil but ended up going back to the traditional butter, flour, and sugar base for this fruit crisp recipe.
- fresh cherries – I used organic sweet cherries from a grocery store, which were still sour enough to give this recipe the tartness it needed
- apples – I used Gala and Pink Lady in testing and either one will work. Granny Smith apples and Honeycrisp apples would also give an extra level of tartness to your fruit crumble!
- cornstarch
- lemon juice
- fresh ginger
- vanilla extract
- oats (I use quick-cooking oats)
- all-purpose flour
- brown sugar
- ground cinnamon
- salted butter
- salt
HOW TO MAKE IT
STEP 1: REMOVE THE CHERRY PITS
First things first–ever wondered what the best method is for removing cherry pits? I read about this somewhere years ago (I think maybe food52?) and it really is genius.
HOW TO REMOVE CHERRY PITS
Simply place the cherry at the top of a clean bottle with an opening that is too small for the whole cherry to fit through (such as a hot sauce bottle). Slip a wide metal straw over the stem, holding the cherry in place with your other hand. Push the straw down and through the cherry. The pit will pop right out of the bottom and land in the bottle. Fancy!
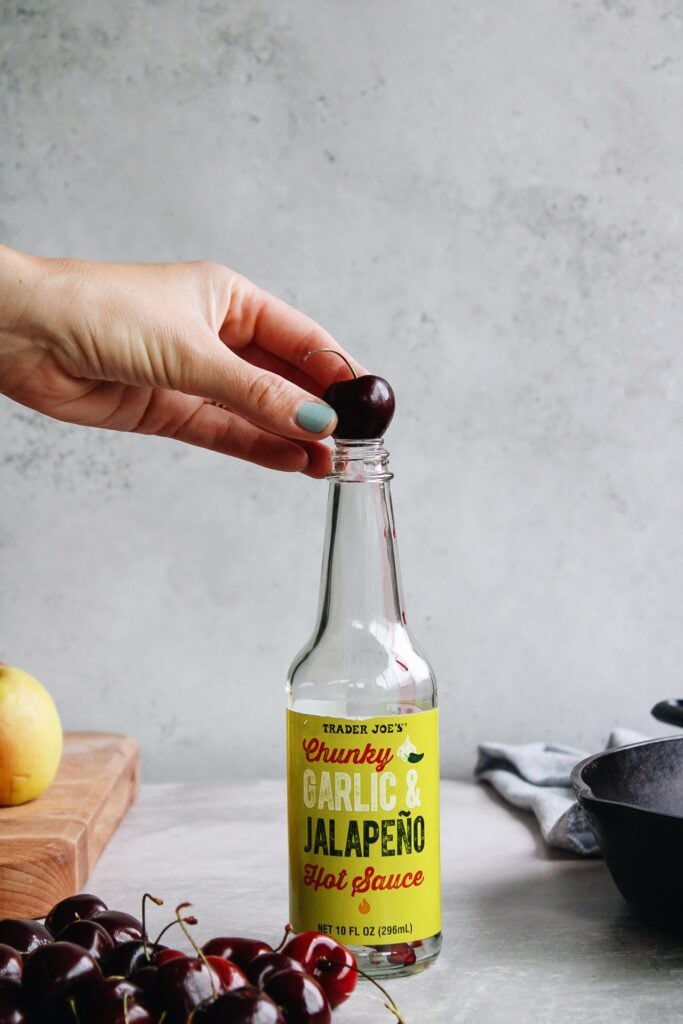
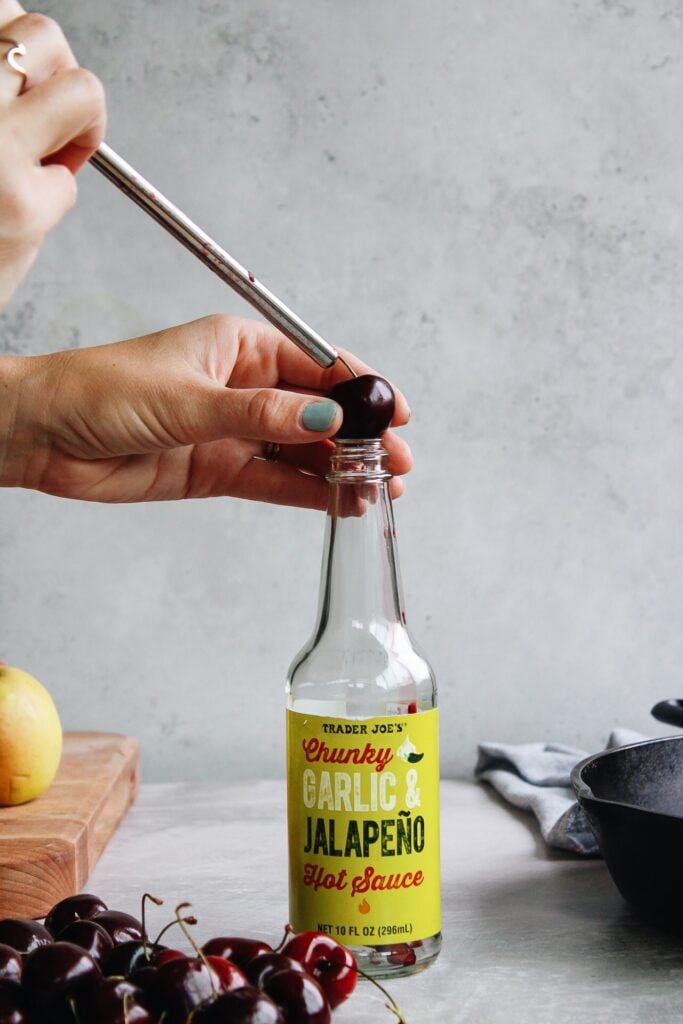
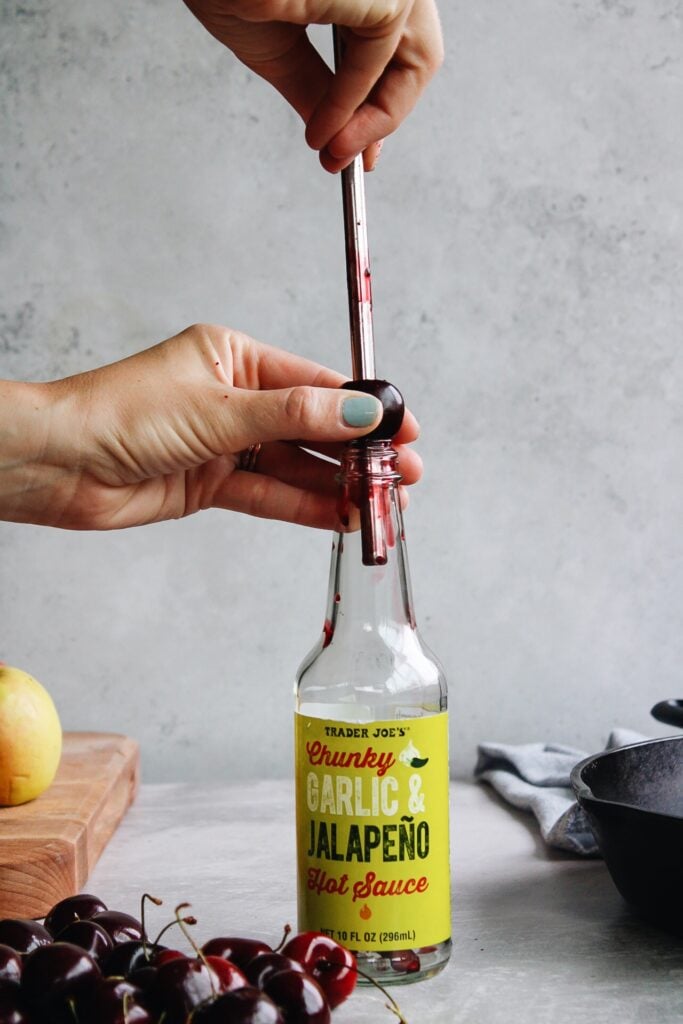
Pro-tip: wear black while doing this. Juicy cherries might splatter here and there, not much but all it takes is one tiny spot of cherry juice on a light-colored shirt to ruin your day. Been there lol.
Another great way to remove the pits is with a cherry pitter.
STEP 2: COMBINE
Combine the apple slices and pitted cherries in a large cast-iron skillet. Add the juice of one to two lemons, vanilla, corn starch, fresh ginger, brown sugar and a pinch of salt then stir to combine. Leave the fruit in an even layer.
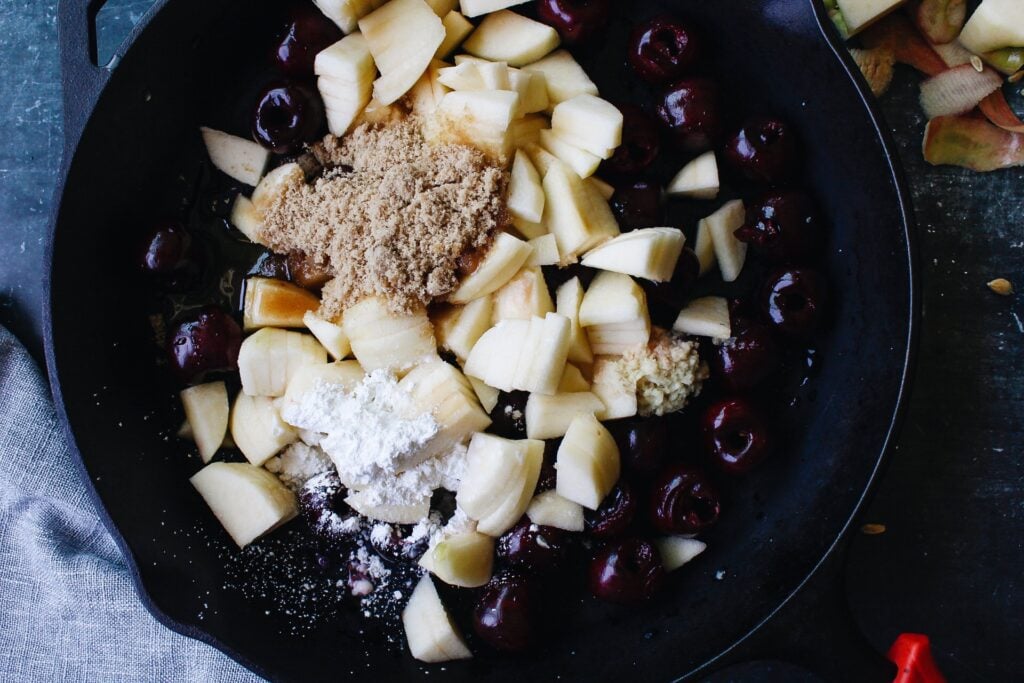
STEP 3: MAKE CRUMBLE
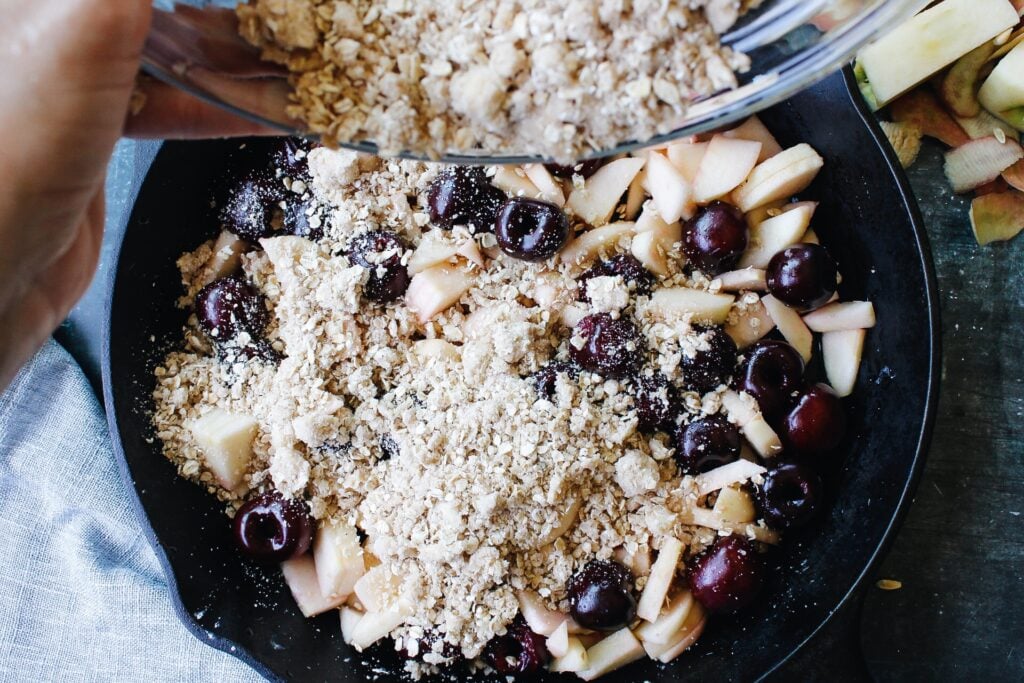
In a medium bowl, combine oats, flour, brown sugar, cinnamon, butter and salt. Stir to mix to combine the dry ingredients a little then work the butter into the mixture by pressing the butter between your fingers with the dry mixture. Keep doing this until only small flour-coated coarse crumbs of butter remain.
STEP 4: BAKE
Sprinkle the topping over the crumble evenly and bake at 400F for 25-35 minutes, until the topping is golden brown and the fruit is bubbling beneath.
STEP 5: ENJOY!
Serve warm with a scoop of vanilla ice cream or fresh whipped cream for the perfect finish!
STORAGE INSTRUCTIONS
Let your cherry crumble cool to room temperature, then store it in an airtight container for up to 3 days in the fridge.
Tried this recipe?
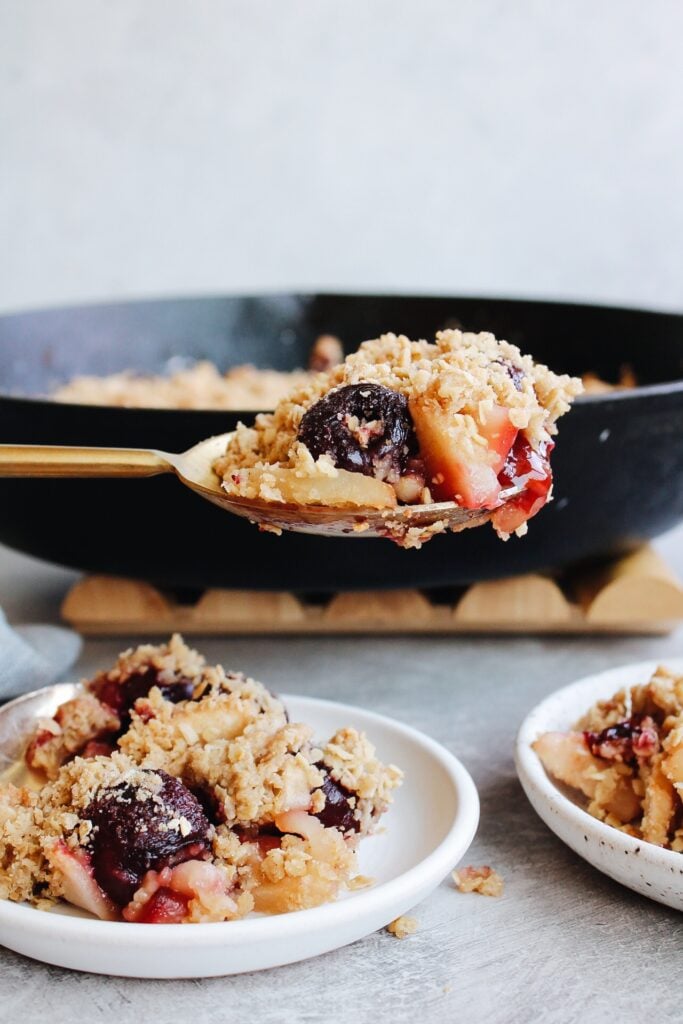
If you try this recipe, please leave a star rating below and let me know how it went. I’d love to hear from you!
You can also find me on Pinterest!
More easy dessert recipes
Easy Cherry Apple Crumble
Say hello to the most delightful cherry apple crumble recipe! It’s made with simple ingredients (mostly pantry staples!) and is so, so good. Cherry and apple go together incredibly well for just the right balance of sweet & tart.
- Prep Time: 20
- Cook Time: 35
- Total Time: 55 minutes
- Yield: 8 1x
- Category: dessert
Ingredients
- 3 cups pitted fresh cherries
- 4 small pink lady apples, peeled and cut into small pieces
- 1 tbsp cornstarch
- 4 tbsp fresh lemon juice
- 1 tsp vanilla
- 1 inch knob fresh ginger, grated
- 1/2 cup brown sugar, divided
- 3/4 cup oats
- 1/2 cup all-purpose flour
- 1 tsp cinnamon
- salt
- 6 tbsp cold butter, cut into slices
Instructions
- Preheat oven to 400F.
- Combine cherries, apples, corn starch, lemon juice, vanilla, ginger, 1/4 cup brown sugar and a pinch of salt in a 12-inch cast iron skillet. Mix until ingredients are evenly distributed and in an even layer.
- In a medium mixing bowl combine oats, flour, cinnamon, a generous pinch of salt and sliced butter. Mix and work the butter into the dry ingredients with your fingers by continually squeezing butter into the oat mixture. Do this until only small lumps of butter remain.
- Sprinkle the crumble topping evenly over the fruit and bake for 25-35 minutes, until topping is golden and fruit is bubbling.
- Enjoy warm with ice cream or fresh whipped cream.
Notes
skillet – a 10-inch skillet will work too, the topping will be a little more dense but that’s not a bad thing here.


